The Sim Rig
The racing rig used by PioneerX’s founder has been through several iterations over time, and continues to evolve as the needs change.
The rig was originally intended for use as a truck driving platform with it’s focus on Euro Truck Simulator 2.
Iteration 1:
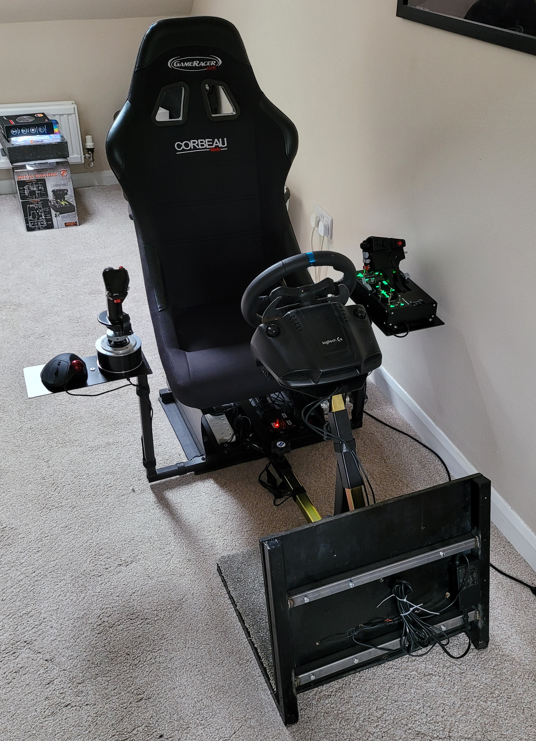
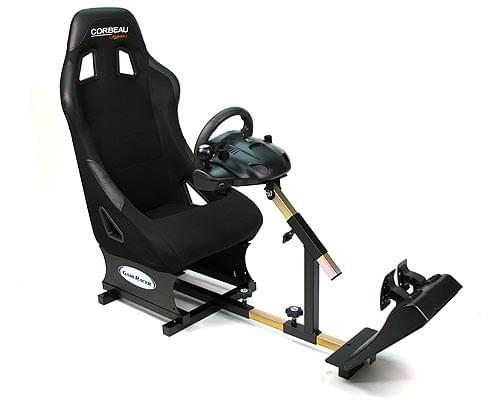
The starting point was a cheap second hand GameRacer Elite play seat bought on ebay. This was paired with a new Logitech G29 Steering Wheel, Pedals and Shifter package.
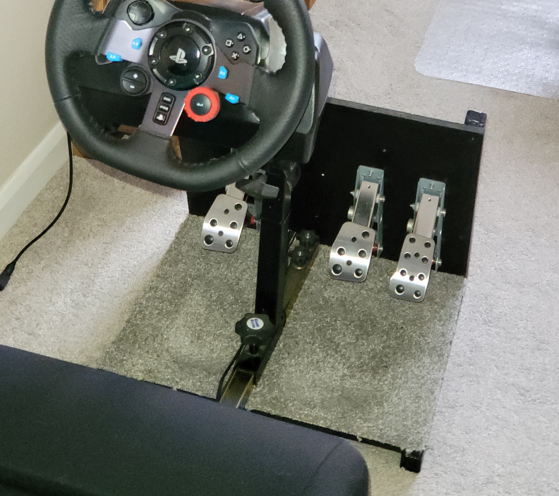
However, this is not where iteration 1 ends because as a truck simulator I wanted the pedals to be hinged at the top as you would find in most production cars I was use to driving. To achieve this the end plate for the GameRacer was removed and a custom made steel frame (with MDF panels) was added. One of the reasons for choosing the G29 wheel was the design of the pedals. Each single G29 pedal is a sperate unit made of folded sheet metal and then screwed into the plastic housing. Due the design it is easy to remove the pedals from the housing (non-destructively) and remount them to something else, just be careful when relocating the cables as these wires are extreamly thin and easily broken.
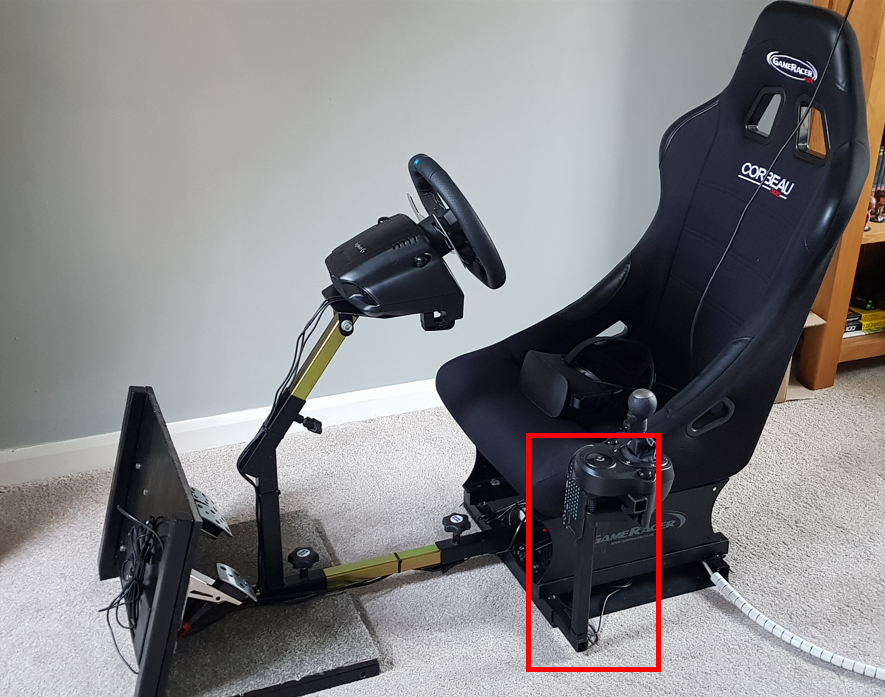
Finally for iteration 1 was the shifter. After some googling I found that several retailers do a shifter mount for the GameRacer, however at the time it was out of stock everywhere and I had a lot of left over steel tubing from a different project, so built the shifter mount myself. This is a simple Z frame that inserts into the GameRacer frame at the bottom (clamped by a couple of bolts through the frame) and on the top is a T section to allow the 3 clamps of the shifter to screw down on to them.
A flat wooden panel was added under the seat as well. This panel holds all the electronics. I wanted the tether coming from the rig to be as small as possible so the white cable trunk contains only a mains power cable and a USB extension cable. This allows for a 4 way power bar and a USB hub to be mounted under the seat and have everything connected to those.
For those that haven’t noticed in the image, there is an Rii mini keyboard on the side of the shifter mounting. This is a standard Rii mini keyboard with a magnet glued to the back and it therefore sticks to the steel upright post, it connects wirelessly to the a dongle in the USB hub on the undertray of the rig. Also on the seat is the original Oculus Rift that is used instead of screens for the Rig, the sensors for this Rift are mounted in the top corners of the room the rig it in as it is also used for ‘Room scale’ games.
I quickly discovered that when driving trucks you need more gears than the 6 (plus reverse) offered by the shifter and that real trucks manage this with an SKRS which is special shifter knob that has a couple of extra switches attached to it allowing for extra ‘ranges’ to be selected. I needed one of these, but being adept at electronics and owning a 3D printer I decided to make one. In researching the best way to do this I came across the following video.
I purchased all the parts (~£15) and printed the adaptor. After assembly and attachment to the rig I found this was brilliant to use. The two switches show up in windows as buttons and was very easy to configure in ETS2 and now I had access to 18 speed gearboxes.
After 108 hours of ETS2 the rig was still working faultlessly, but as I now have the rig I took a look at SimRacing. Specifically I got a copy of Assetto Corsa as the simulator was highly recommended, had huge amounts of content and at the time I could get it all from Steam for just £9.
Update 1:
Well the next major change for the rig wasn’t with the rig itself but with the VR being used. HP announced the HP Reverb G2 and as I had stuck with the Oculus Rift since it’s launch I decided to update and therefore pre-ordered the new HP. In anticipation for it’s arrival I also updated the GPU in my computer to an Nvidia RTX2080Super (this was before the launch of the 30 series).
The new headset arrived and the Oculus cameras and headset were removed and sold. The upgrade in image quality was worth every penny.
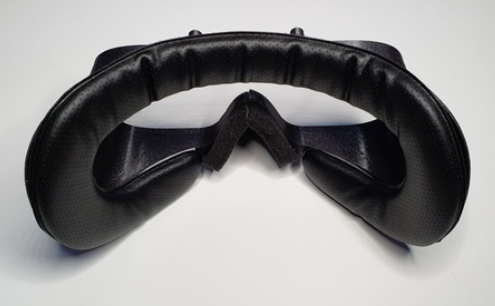
The HP Reverb G2 has a fairly narrow facial interface which is designed to accept a head that is smaller than my own and as such was causing pressure on my temples and making wearing it uncomfortable. This was fixed by printing a new facial interface from https://www.thingiverse.com/thing:4700782 and attaching a cheap ebay replacement pad to it (they use velco fixing). This new interface does two important things, firstly is makes the fitment wider and therefore fits my head better, secondly it brings the lenses a little closer to your eyes which improves field of view.
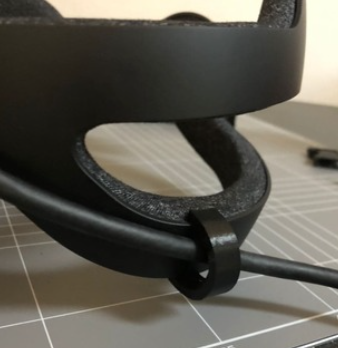
In addition to this I also printed an extra cable hook, https://www.thingiverse.com/thing:4651067, since the standard cable exit for the G2 is on the left but my PC is on the right of my rig so the cable needs to run down the back and out the other side, this extra clip does the trick.
In addition since I will be wearing the headset a for long periods of time (some DCS missions can be at least a couple of hours) I wanted the headset to be as comfortable as possible. To achieve this I invested in CreativeVR’s balance kit, this kit contains an extra strap that goes across the top of the head and helps spread the load over the head and an extra balance weight that goes on the back of the headset to balance out the weight at the front. These two parts together make the headset a little heavier overall but distribute the weight over the entire head much better.

Update 2:
Having been racing in Assetto Corsa for a while I was starting to see limitation in the way I drove a race car. Unfortunately it seems that learning to use a brake pedal where the braking power is determined by the pedal position and not the force being applied, like it would in a real car, was just something I couldn’t adapt to. It therefore meant that I required some form of upgrade to my pedals. Changing the entire pedal system for something else was not really a financial outlay I could justify to my wife so I started to look at loadcell mods for the G29 pedals I had, after all I was very happy with the throttle and clutch. I eventually found the TrueBrakeV2 which, while not a true loadcell, changes the behaviour of the pedal to something almost identical to a loadcell.
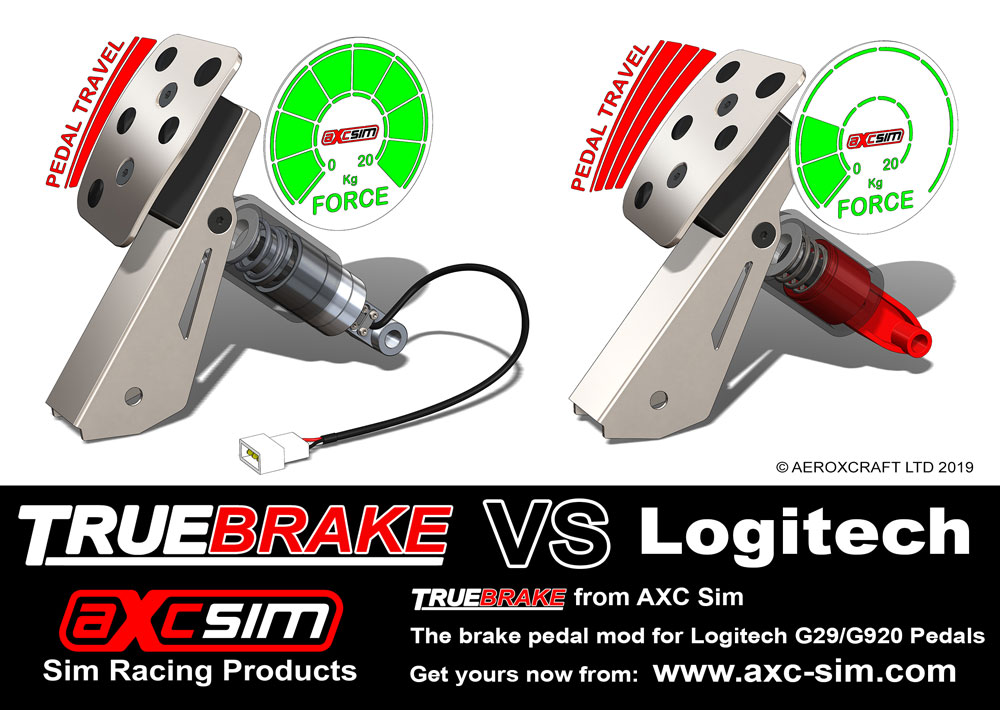
This was added to my existing pedals and made a massive difference especially given it’s extreamly reasonable price.
Update 3:
As mentioned previously the room the rig it in is also a ‘room scale’ VR space and as such the rig needs to break into 2 half’s for storage at the back of the room when the VR space is in use. Up until the addition of the shifter this has always been easy as the pedals plugged into the wheel and the power and USB cables from the wheel ran down the center spine of the rig but had plug and sockets in the middle (power and USB extension cables).

With the addition of the shifter there was a DB9 cable that ran back from the seat up this spine and to the wheel base. This was not ideal since is made the rig very difficult to separate. Now I could have just put a DB9 extension cable in like the others and solved the problem, however it was at this time I also discovered that the G29 pedals, that connect the wheel base, have their output modified by the firmware in the wheel base to try to simulate a loadcell experience (very badly) for the brake pedal. I obviously wanted more control over the way the pedal inputs where seen by the PC which lead me to change both the way the pedals and shifter attach. Currently they attach to the wheel base, but I wanted them direct to the computer as USB devices.
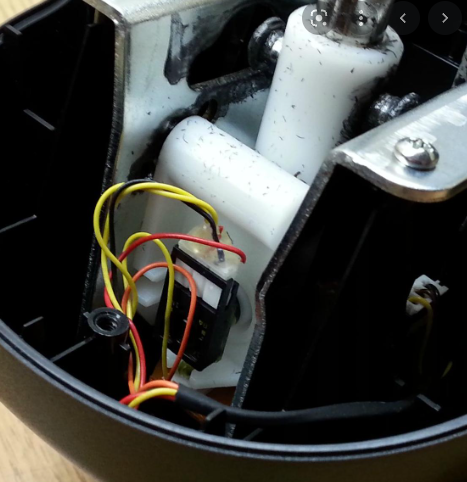
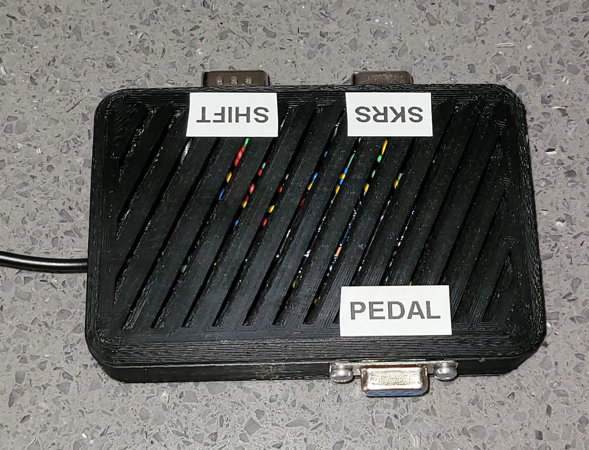
The biggest challenge was going to be the interface, but this was easily solved with an Arduino ProMicro and the joystick library available @ https://github.com/MHeironimus/ArduinoJoystickLibrary which presents the ProMicro to the PC as a USB joystick with configurable buttons and axis. So this would take care of the pedals as I could just attach each pedal’s potentiometer (yes the TrueBrakeV2 still presents as one) to analog inputs of the ProMicro and it would report those to the PC as joystick axis. The Shifter was going to be a different matter until I discovered that inside the shifter are just two potentiometers and a switch.
The firmware in the Logitech wheel base is designed to take the position of these potentiometers and convert those to the gear button output the PC sees. I was going to replicate this until I found someone had already done it https://github.com/armandoiglesias/g29Shifter. All that I really had to do was wire it up and make some changes to allow the g29Shifter code to also accept the pedal input (3 analog inputs) & the SKRS switches (2 digital inputs). Since my pedals where mounted in an unusual way I also added a calibration function so that the correct values could be reported back to the PC.
https://gitlab.com/PioneerX/pioneerx-gaming-chair
All this was placed in a 3D printed box with DB9 connectors (so the original Logitech connectors could be plugged in unmodified) and the whole thing attached to the USB hub on the undertray.
Iteration 2:
This is where flight comes in. I have always had a passion for flight but flight simulators had always be beyond my reach financially. Since I have the basics of a race simulator (and VR) already I decided converting to allow flight wouldn’t be too difficult or expensive.
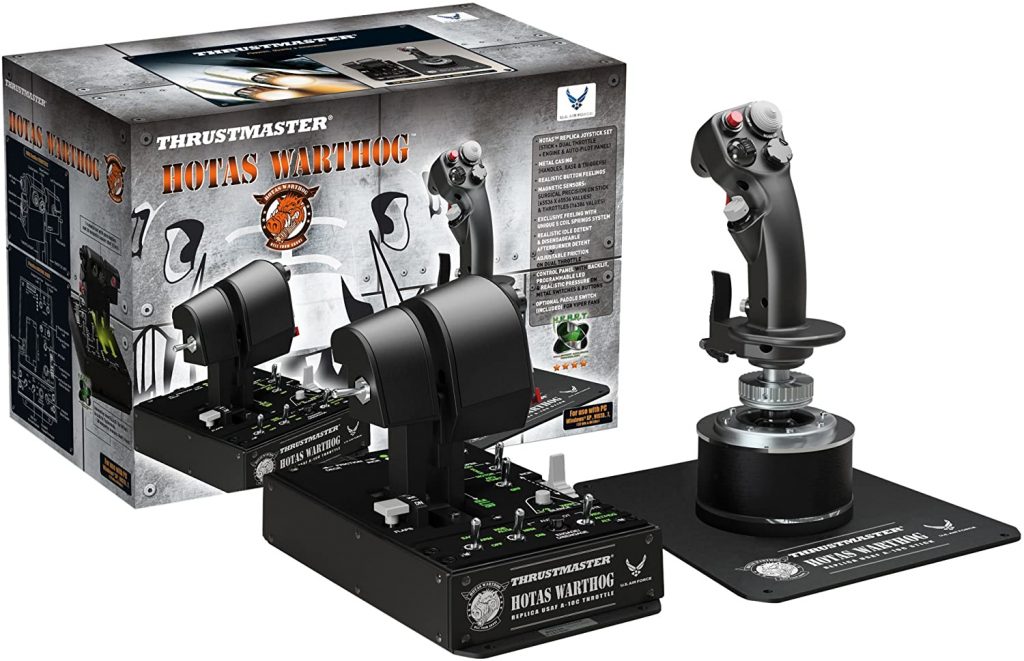
After much research I settled on DCS as my flight simulator and specifically the A10C aircraft. This was partly driven by the extreamly good DCS simulator but also, because I use VR in the rig, I wanted the controls to be as close to those I see in the aircraft as possible because I thought it would make learning them easier since with a VR headset on I would be unable to see the physical controllers. To this end I purchased DCS and the new A10C Tank Killer module as well as the Thrustmaster Warthog controllers.
This meant a rig change as well. I wanted to keep the racing side of the rig but simply add flight on as well. Fortunately after 108 hours of driving trucks I had moved on to racing and was no longer using the shifter. Due to the previous update removing the shifter was simply a case of unplugging it from the custom controller, I could then reuse the frame the shifter was on.
So with the shifter removed a steel plate was bolted (so I could put the shifter back later if I wanted) to the shifter frame. This plate was sized to match the Warthog throttle controller and the controller was bolted to it. A second steel frame (very similar design) was made and added to the other side of the rig. This second frame also had a top plate bolted on and the Warthog stick (minus its own metal plate) was bolted to this. I made this second plate a lot bigger as I had discovered that I needed the mouse to navigate around the A10C’s cockpit and in world controls. The extra space on this plate was used to hold a trackball, this meant that I had mouse operation but in a device that was always where I expected it to be, so easy to find with a headset on. Both plates have rubber edging fitted so they are safe.
It should be noted in the above picture that two extra steel pieces were added to the pedal assembly. This was done at the time the TrueBrakeV2 was added as the extra braking force now being applied would cause the MDF panel to flex so the pedals now mount through the MDF and into these two steel beams.
Update 4:
So I drove and flew this configuration for a little while but had TWO big problems with it.
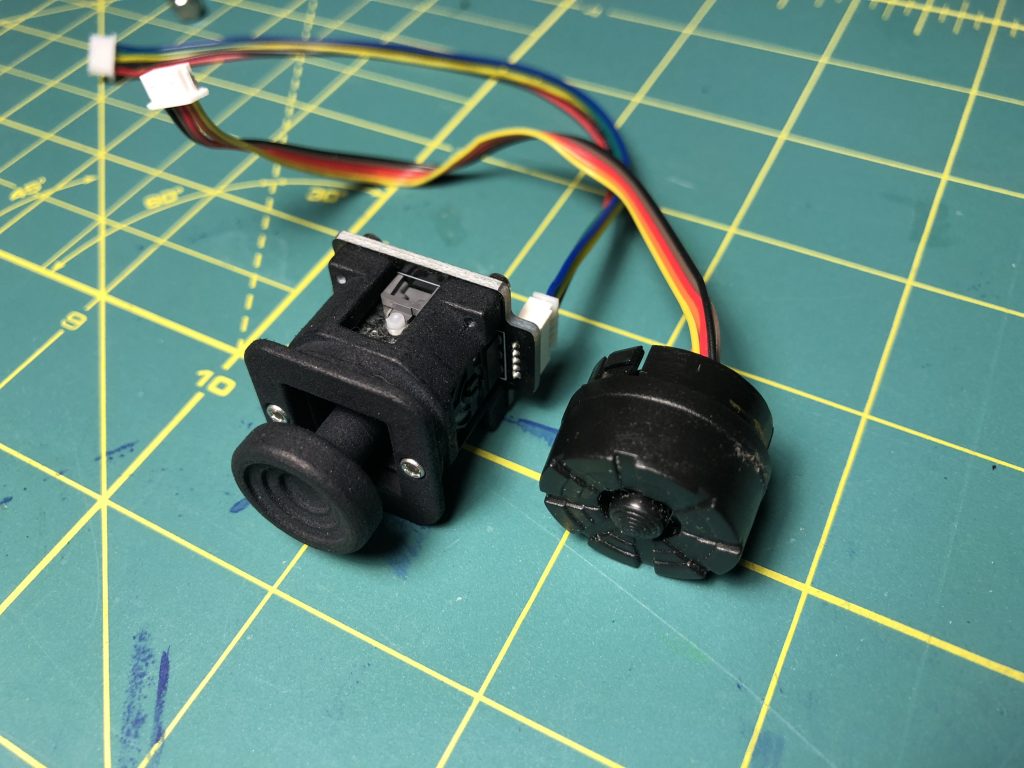
The first was with the Thrustmaster Warthog throttle. Thrustmaster replicated the real Warthog throttle very well but with one exception. The slew control (the mouse like control you navigate the screens in the cockpit with) was implemented as a very sensitive nipple mouse design contrary to the actual aircrafts control. This made navigating the MFDs (Multi function displays) of the aircraft, a key function of the A10C, very difficult. Fortunately DeltaSim make a very nice replacement for this part that changes the original nipple design (right) to an aircraft correct analog joystick design (left).
The second problem with the rig design is that to correctly fly a plane you need rudder controls. This wasn’t too bad in the A10C since it can be flown without the rudder, however the rudder control also does the nose wheel steering that allows you to steer the plane when on the ground. I was using one of the controls on the throttle assembly for this but it was really hard and unintuitive to do. Since I also race in this rig I have standard car pedals and no desire to switch between the two pedal designs every time I want to race rather than fly.
This was solved using a design tweak. Update 3 added an Arduino to convert the pedals to USB. This meant that I had full control over what the computer saw when the pedals where used. I redesigned a bit of the Arduino code to allow for an extra axis to be presented to the computer. This axis was a mathematical calculation based on the position of the throttle and clutch pedals. What it basically does is allows a rudder axis to exist by mixing throttle and clutch inputs. As a result if you press the throttle pedal the rudder axis moves to towards the right, but if you press the clutch pedal the rudder axis goes towards the left. As a result the SAME pedal arrangement I use for driving can be used for flying. This has one limitation, you are unable to use the differential braking feature of the aircraft (where you can apply left and right wheel brake separately to aid a turn). The new Arduino firmware does also make an attempt to present wheel brakes as a function of the combined left and right rudder inputs but I found this was not very effective and reduced rudder control if used so I simply map wheel brakes to a slider on the Warthog throttle and use that instead.
https://gitlab.com/PioneerX/pioneerx-gaming-chair
In addition to these two changes I also added the magnetic shifter mod to the G29 wheel. This mod (available @ https://www.thingiverse.com/thing:4344047) adds a pair of magnets that hold back the steel plate paddle shifters therefore making then require more force to operate and for that operation to be more of a snap than just the original microswitch design.
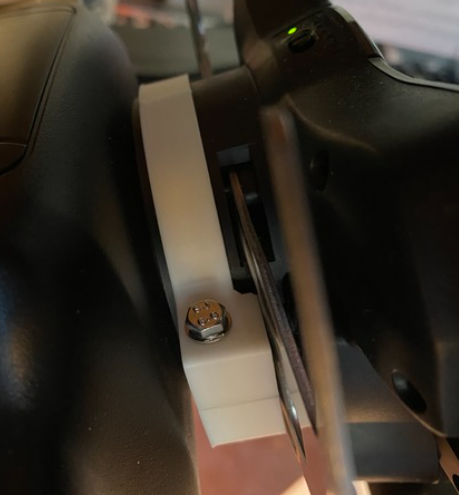
This change means that gear changes are more deliberate and feel much precise than the Logitech original design which in turn reduces missed and unintentional shifts.
Update 5:
The introduction of tactile feedback. Tactile feedback is the ability to feel the road/engine/tire vibrations through your SimRig. It adds to the immersion felt while in the game but also provides additional feel and as the name suggests, feedback about what the car is doing.
Most of what I did came from the following video, although I used a little different hardware.
The hardware I chose to use is…..
- Dayton Audi TS25-8 PUCK Tactile Transducer (2 off)
- Nobsound Mini Power Amplifier
These both came from Amazon and at this time (Jan22) cost £80. I also used some speaker wire I had lying around and a 3D printed bracket for the amplifier which is available @ https://www.thingiverse.com/thing:3091289
The amp is slid into the bracket and then fixed on the inside of my rig near the front where it is out of the way but still accessible as it has a volume knob on the front. It then plugs into the USB hub in the electronics tray and shows up on the computer as a 2 channel sound card.
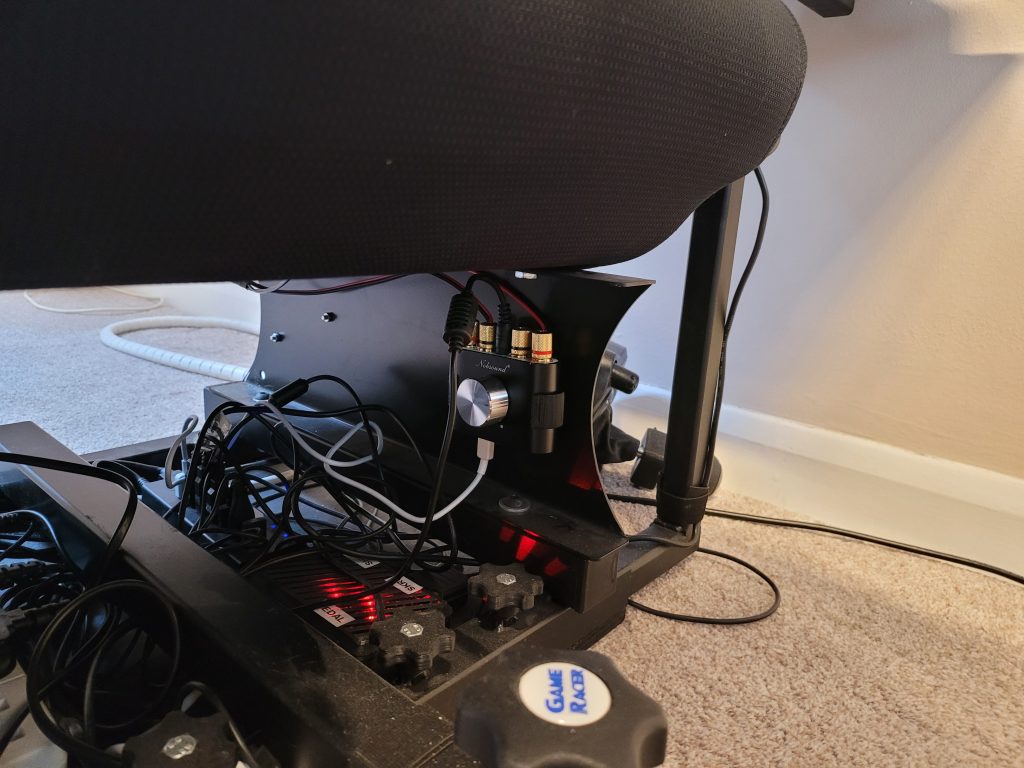
The transducers themselves are bolted to the side rails of the seat support using the brackets provided but not the mounting screws (replaced with M4x20 Cap head bolts).
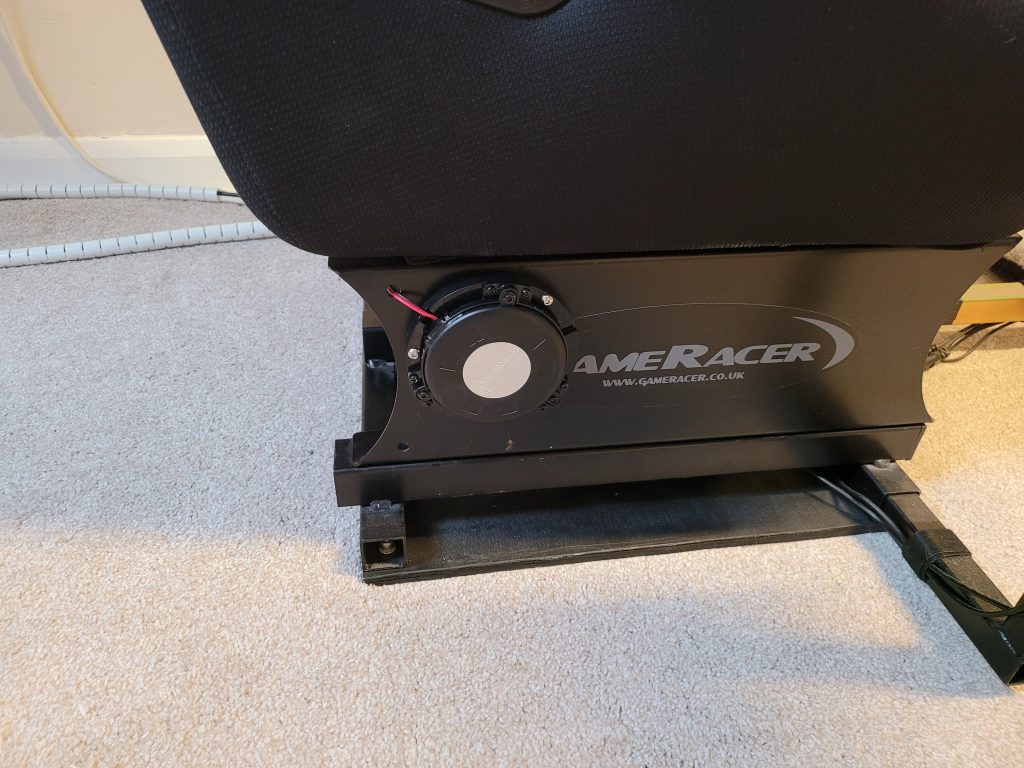
There are two, one on each side, to represent left and right sides of the car. In an ideal world I would have 4 to represent each corner of the car, however as the current rig has a separate pedal system to the main chassis of the rig there is no vibration transfer from the front to the seat, so for now I skipped the extra two.
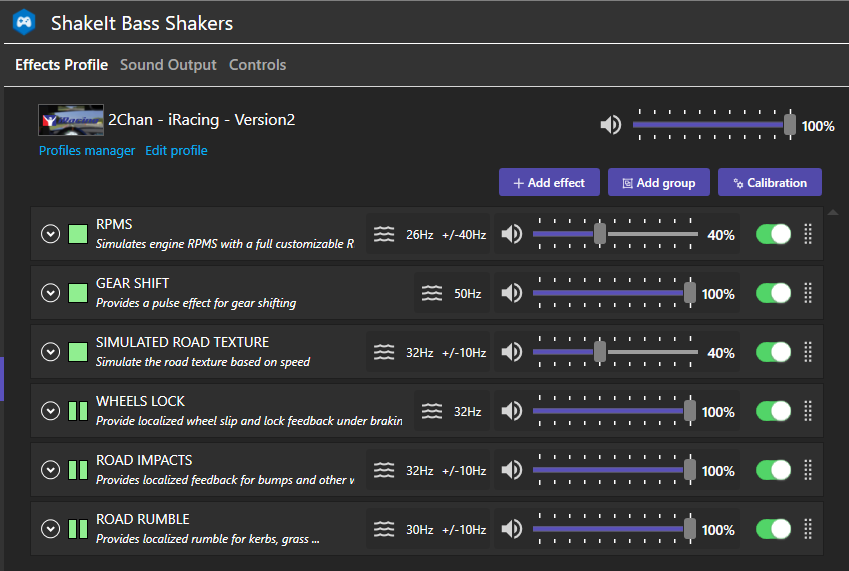
The transducers get their data from the simulator using a piece of software called SimHub, this is available @ https://www.simhubdash.com/ and I very much recommend donating to keep this great software updated.
At this time I have only set it up for iRacing, but other simulators will come later. SimHub takes the telemetry coming from the simulator and triggers the transducers to kick and vibrate in specific ways based on what it going on. For example to feel the engine the transducers are vibrated at a low rumble to match the engine RPM, when you change gear they are kicked to simulate the clutch kick you get during a rapid gear change. However the key with using SimHub for this is to make sure you dont turn on too many effects at once. With too many effects running it’s very hard to make out when something is happening amongst all the noise.
These are the settings I’m currently running, but are subject to change as I tweak them for taste and rig design….
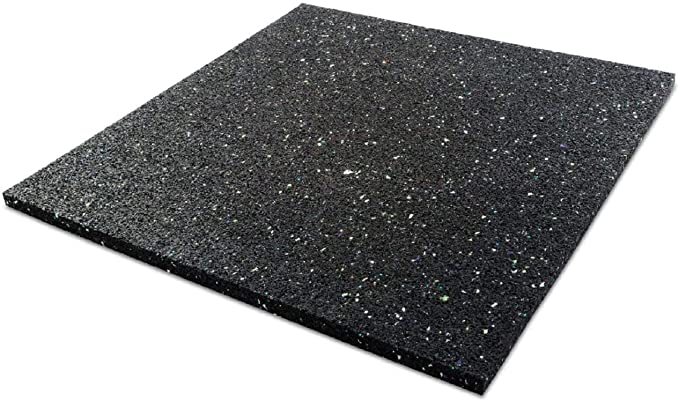
Adding tactile feedback has a couple of knock-on effects. The first being an increase in noise since the rig now vibrates, the second is vibration transfer to the floor. It’s this second one that tends to upset neighbours or other members of your household. To this end my rig now sits on rubber vibration matting designed for washing machines to isolate some of the vibrations from the floor.
Update 6:
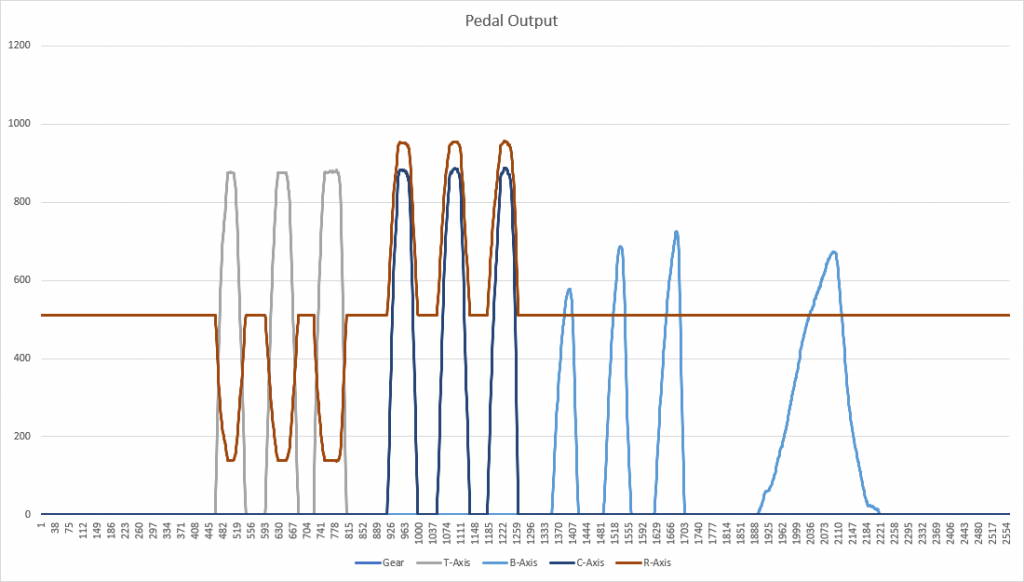
I was not happy with the way braking was working with the rig so some work was done to analyse the issue. The problem was found to be the implementation of ‘deadzone’ (where the pedal movement has no in-game effect) coupled with the G29 pedals being a fairly sloppy design with lots of unintended movement. The two factors combined made the predictability of the pedals not as great as I would have liked and sometimes even sent negative pedal values to the sim.
The fix was an update to the Arduino code that interfaces the pedals to USB. The deadzone and baseline smoothing were reworked to provide a much better representation of the actual pedal movement (or pressure for the brake) to the sim.
The new code is available @ https://gitlab.com/PioneerX/pioneerx-gaming-chair
The Future:
Things being considered for future updates…..
- Direct drive wheel – The Logitech is a gear driven wheel (noisy with a large backlash/dead-zone) and is fairly weak. If I’m going to upgrade then I will likely skip belt driven wheels in favour of a direct drive option.
- Extrusion cockpit upgrade – going to direct drive will need a stronger wheel mount so a full aluminium rig upgrade seems sensible.
- Left foot brake – The current rig has a center post for the wheel mount and the pedals have a clutch (from the truck driving days, also used for rudder in flight) so the throttle and brake are on the same side of the post meaning they can only be used by the right foot. I’m driving more and more Formula style cars which would typically be left foot brake.
- Maybe a pedal update to replace the G29 pedals with something better built with less ‘play’ in the mechanisms.